

ビクトリー大学へようこそ、ヴィア(@Via00Via)です。

このような悩みに応えていきます。
本記事の内容
- ポリゴンNFTをレジャーナノに移動する方法
- レジャーナノから送信する方法
この記事を書いた人

失敗しないようにぜひこの記事を参考にしてください。

レジャーナノにポリゴン(Polygon)を追加する
まず、Ledgerアプリを起動してポリゴン用のアカウントを追加していきます。
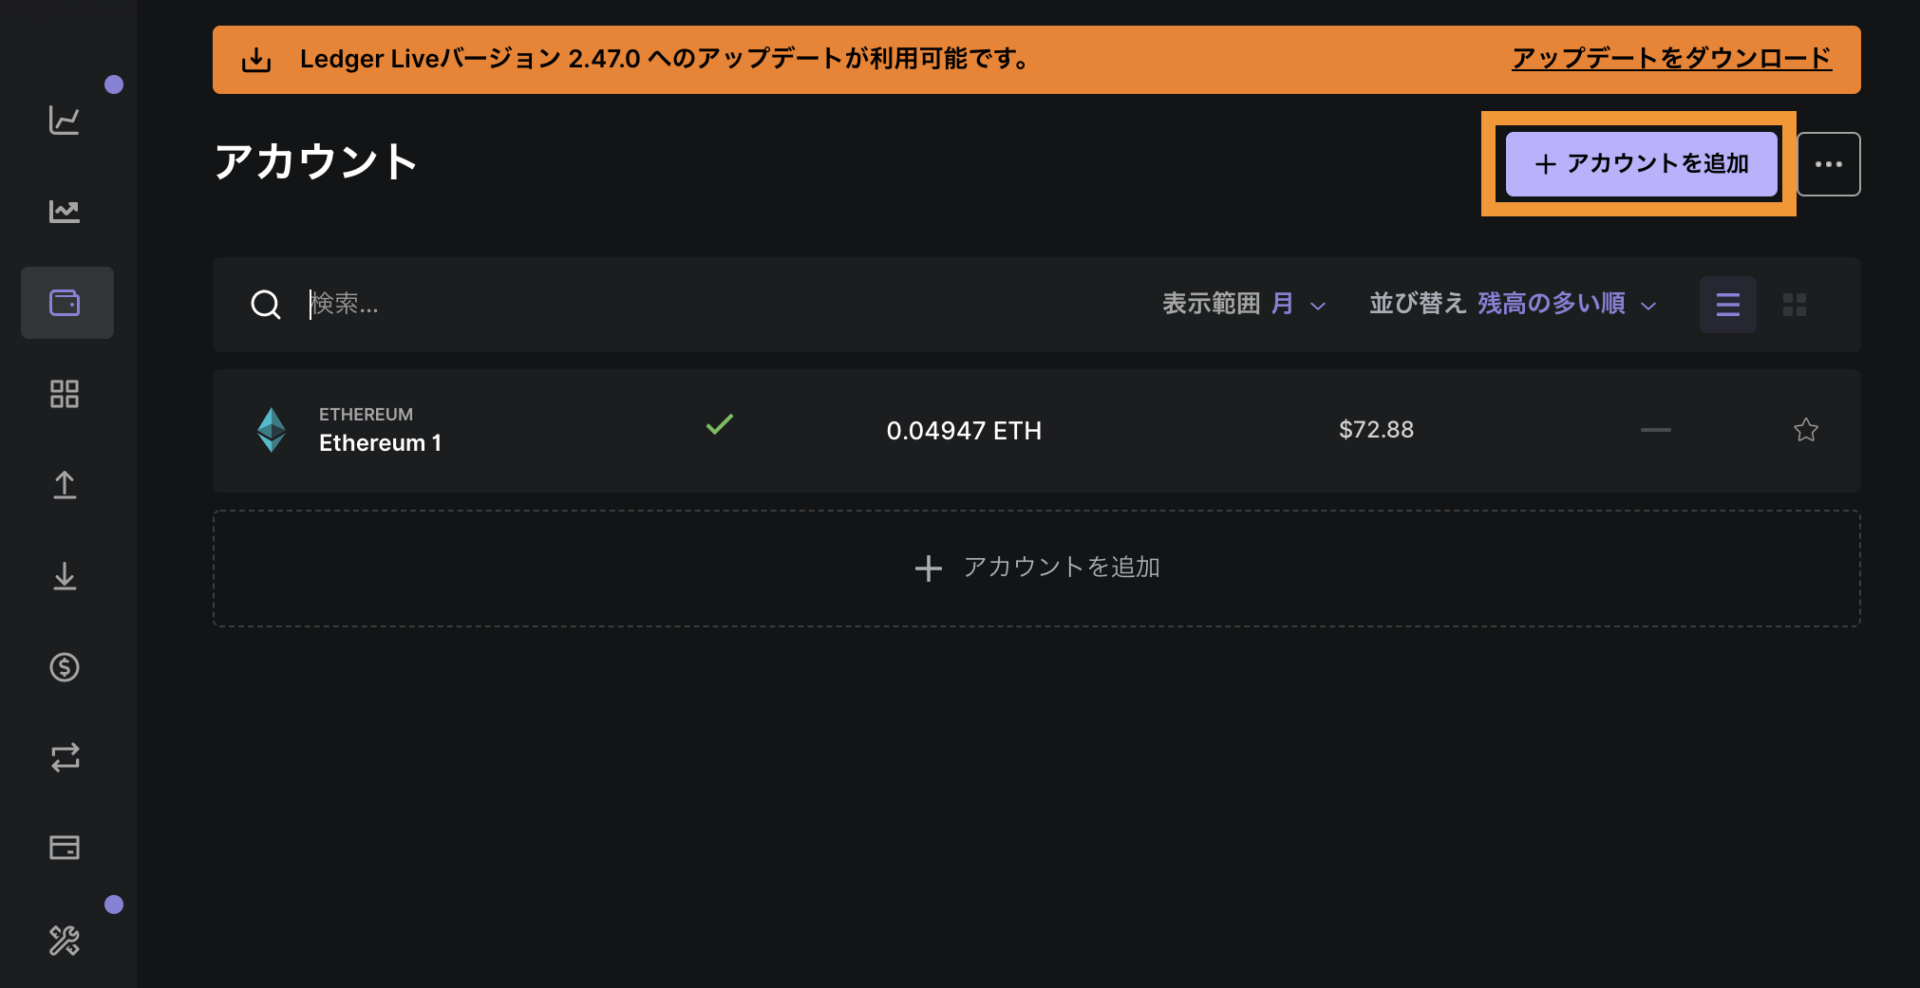
「アカウントを追加」をクリック。
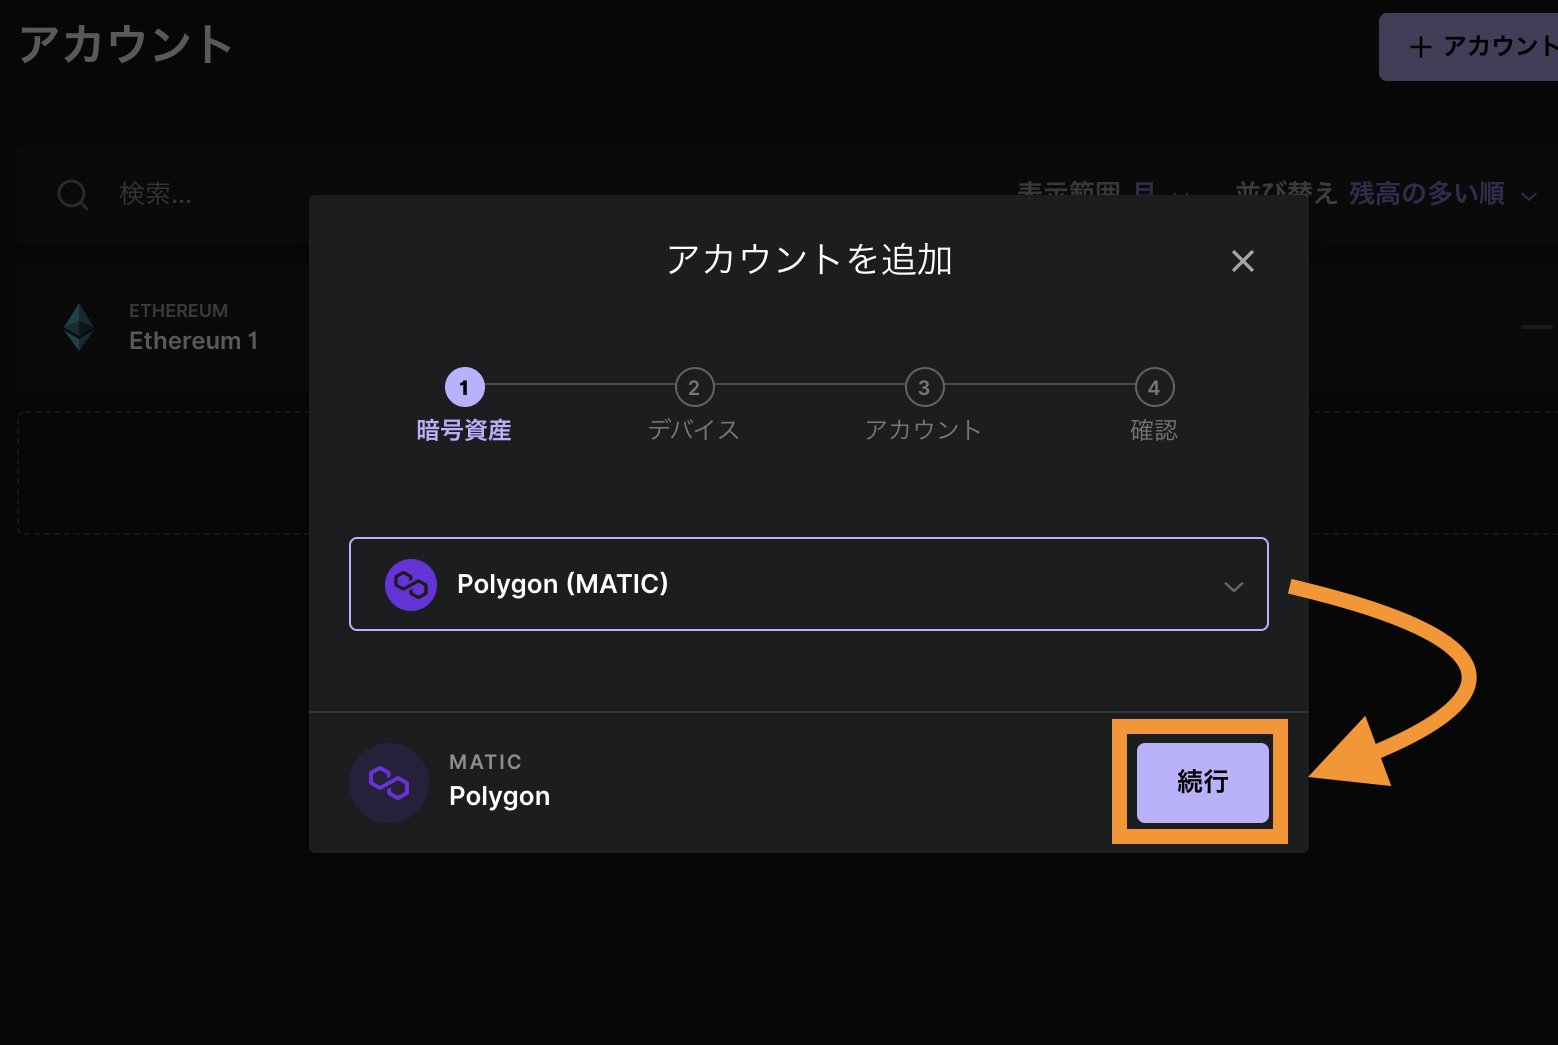
Polygon(MATIC)を選択して「続行」をクリック。

レジャーナノ端末で操作(両ボタンクリック)します。
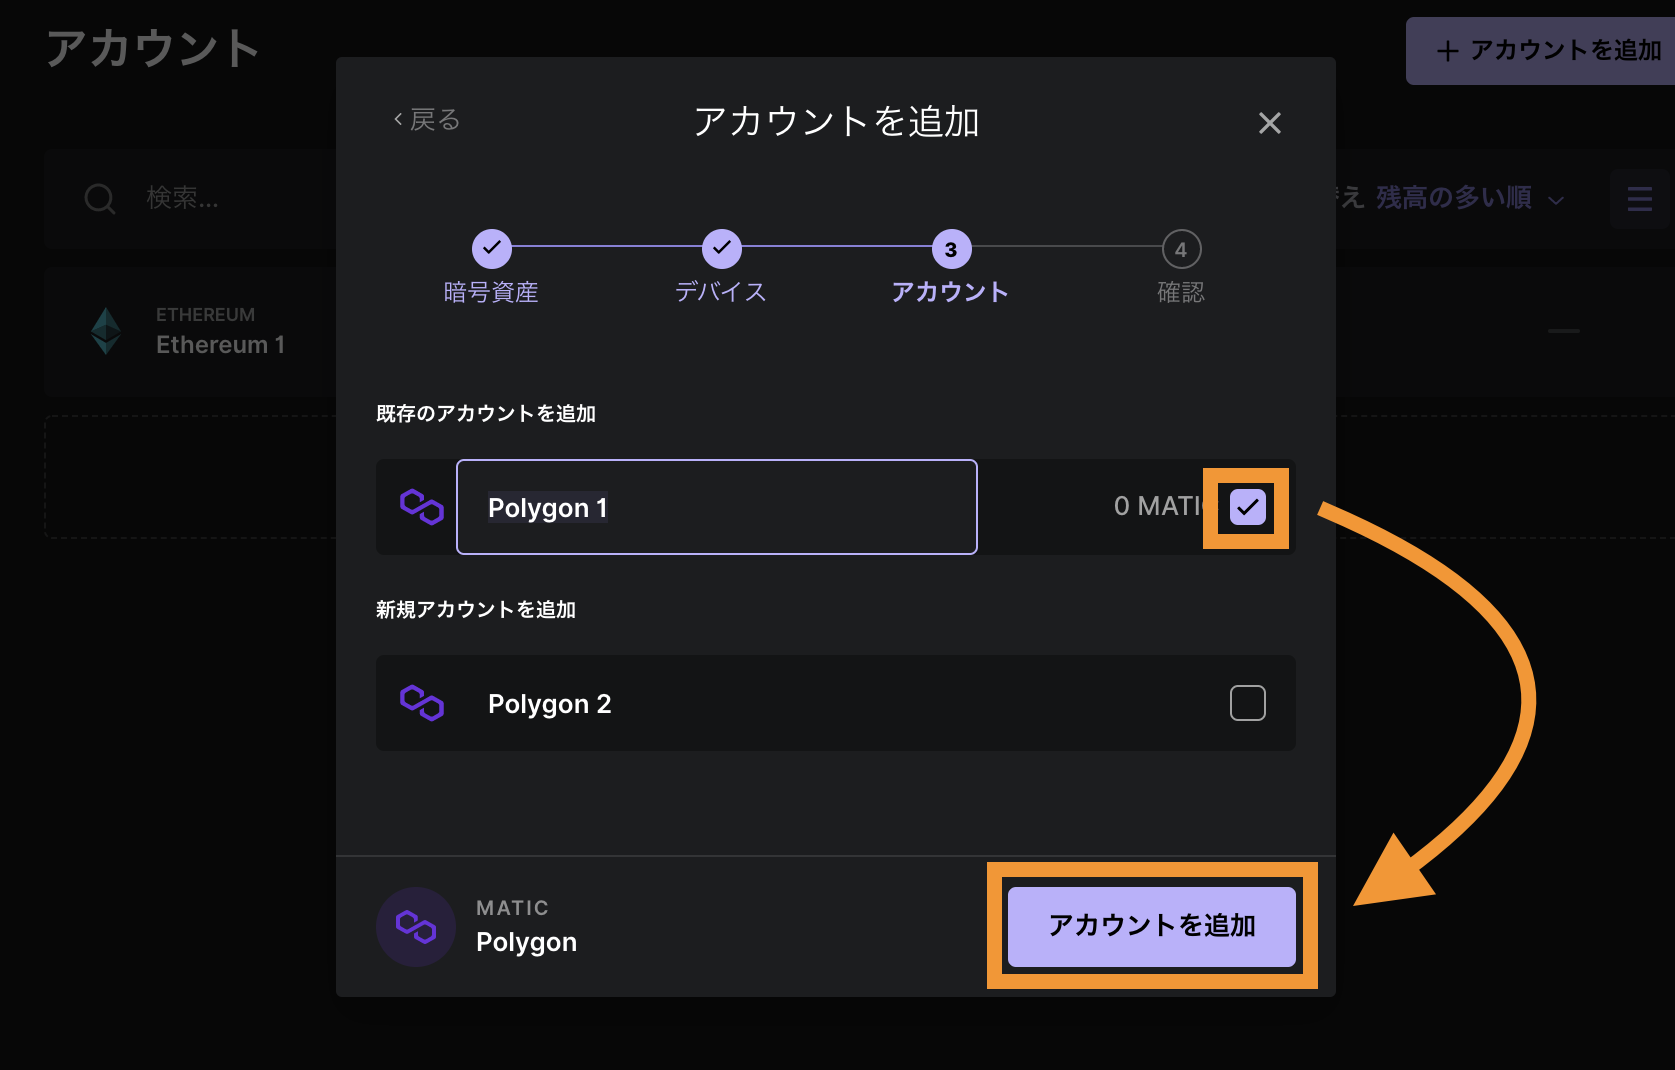
チェックを入れて「アカウントを追加」をクリック。
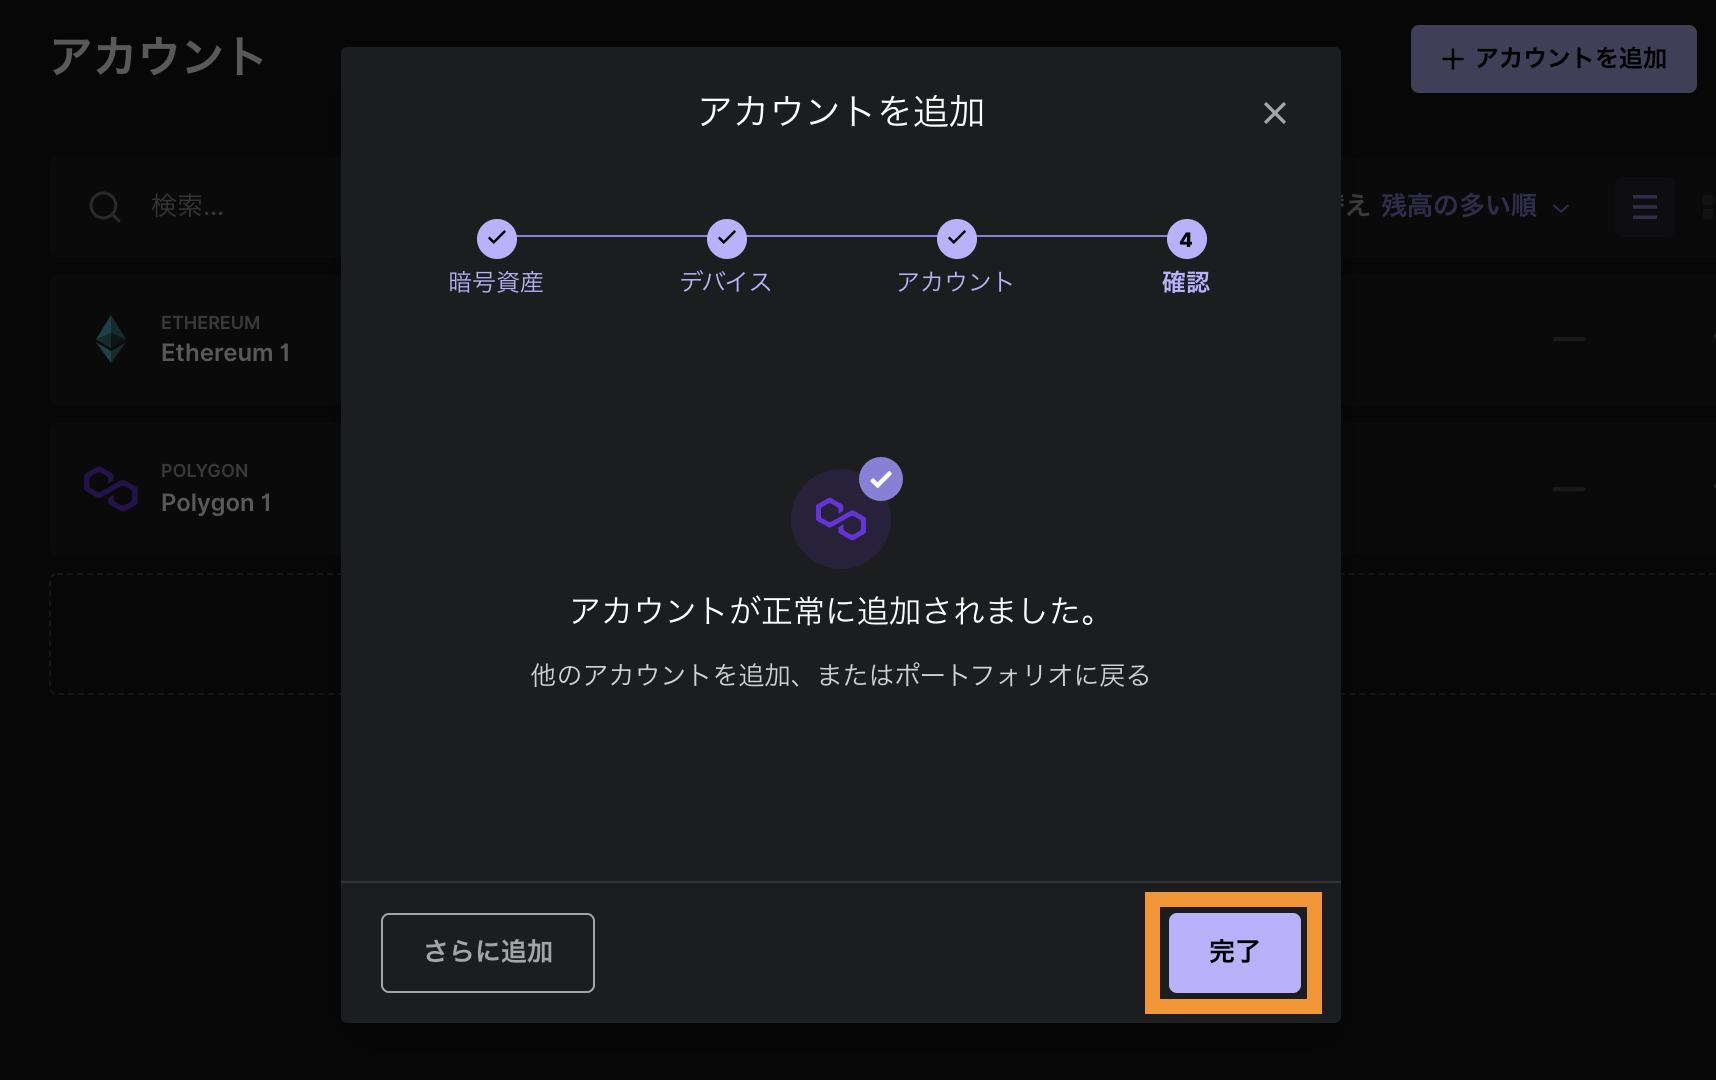
これで追加できました。
ポリゴンNFTの受け取り方
では、レジャーナノでポリゴンNFTを受け取り方を解説していきます。
- ポリゴンアドレスを取得する
- Openseaからトランスファーする
- 届いたか確認する
手順はこのようなイメージです。
STEP①|ポリゴンアドレスをコピーする

Ledgerアプリを起動して、「Polygon」を選択します。

「受け取る」をクリック。

Polygonになっているか確認して「続行」をクリック。
表示されたアドレスをコピーしてからレジャーナノ端末で操作(両ボタンクリック)します。

「完了」をクリック。
STEP②|Openseaでトランスファーする
では、ポリゴン作品をトランスファーしていくのでOpenseaにアクセスしてください。

送りたいNFTを選んだら「トランスファーボタン」をクリック。

先ほどコピーしたアドレスを貼り付けて「Transfer」をクリック。

ガス代を払ったら...

トランスファー完了です!
STEP③|レジャーナノに届いたか確認する
最後に確認だけしておきましょう。
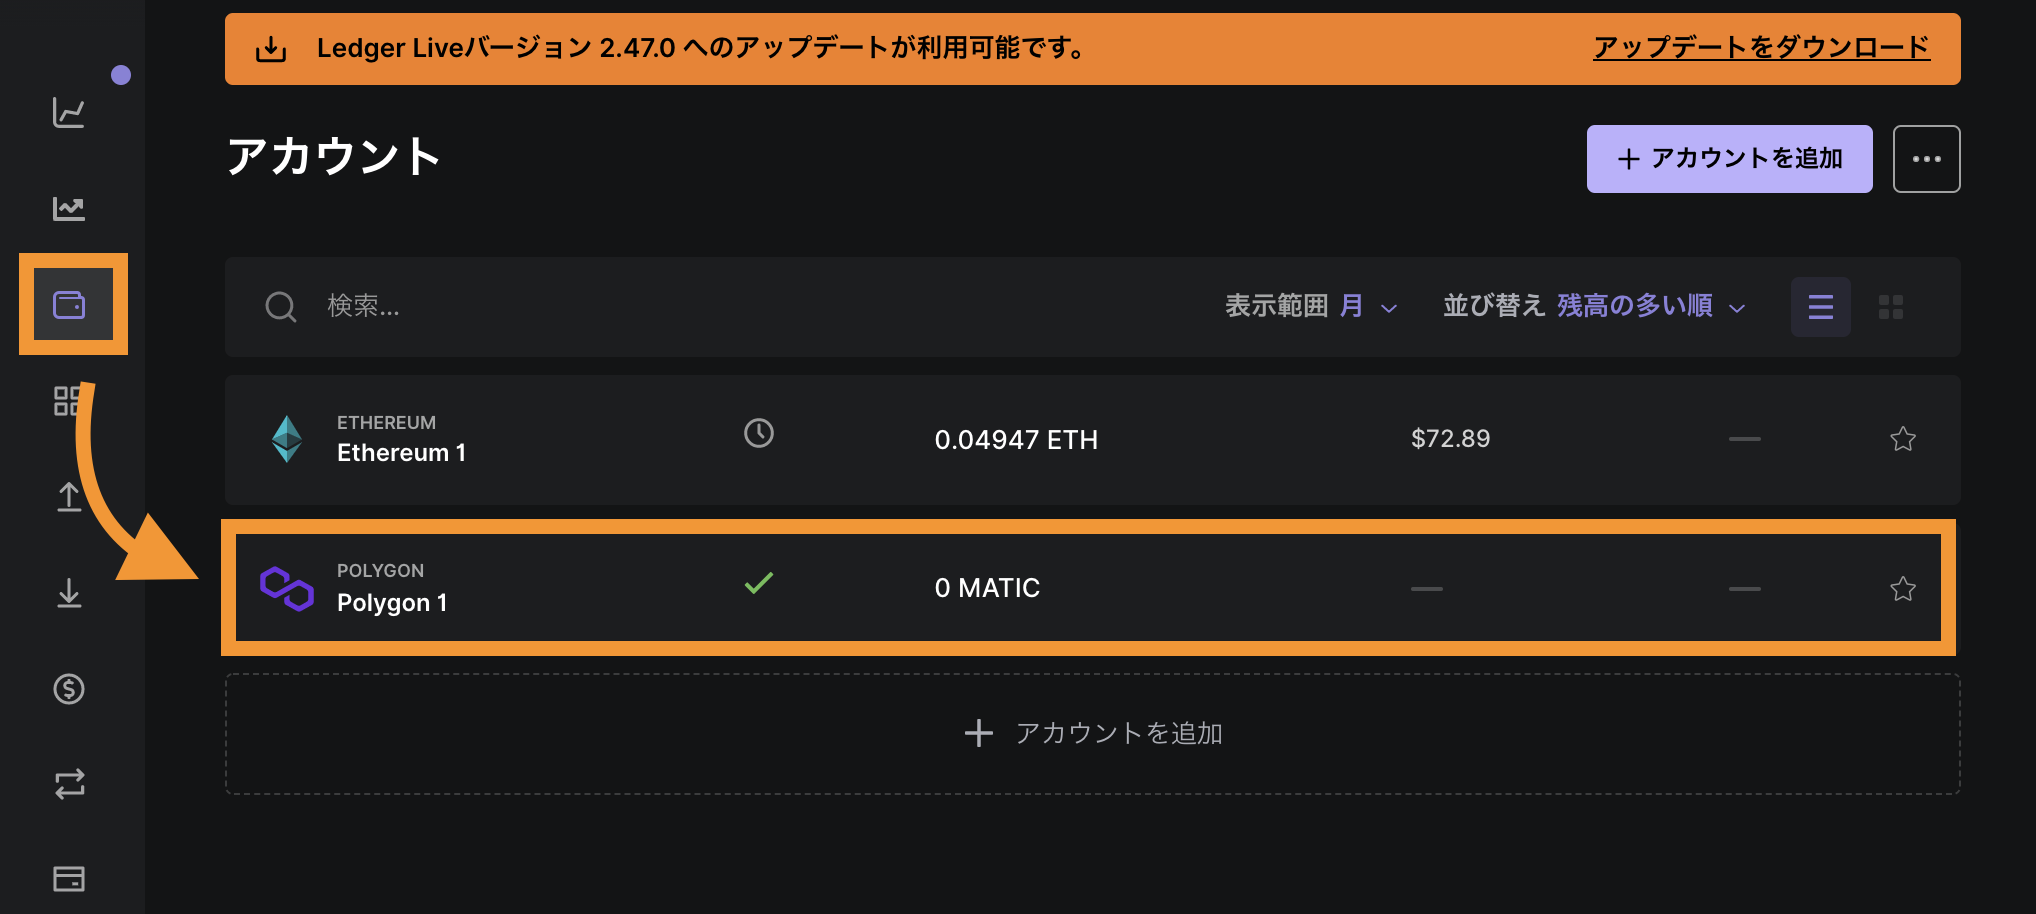
「Polygon」を選択。
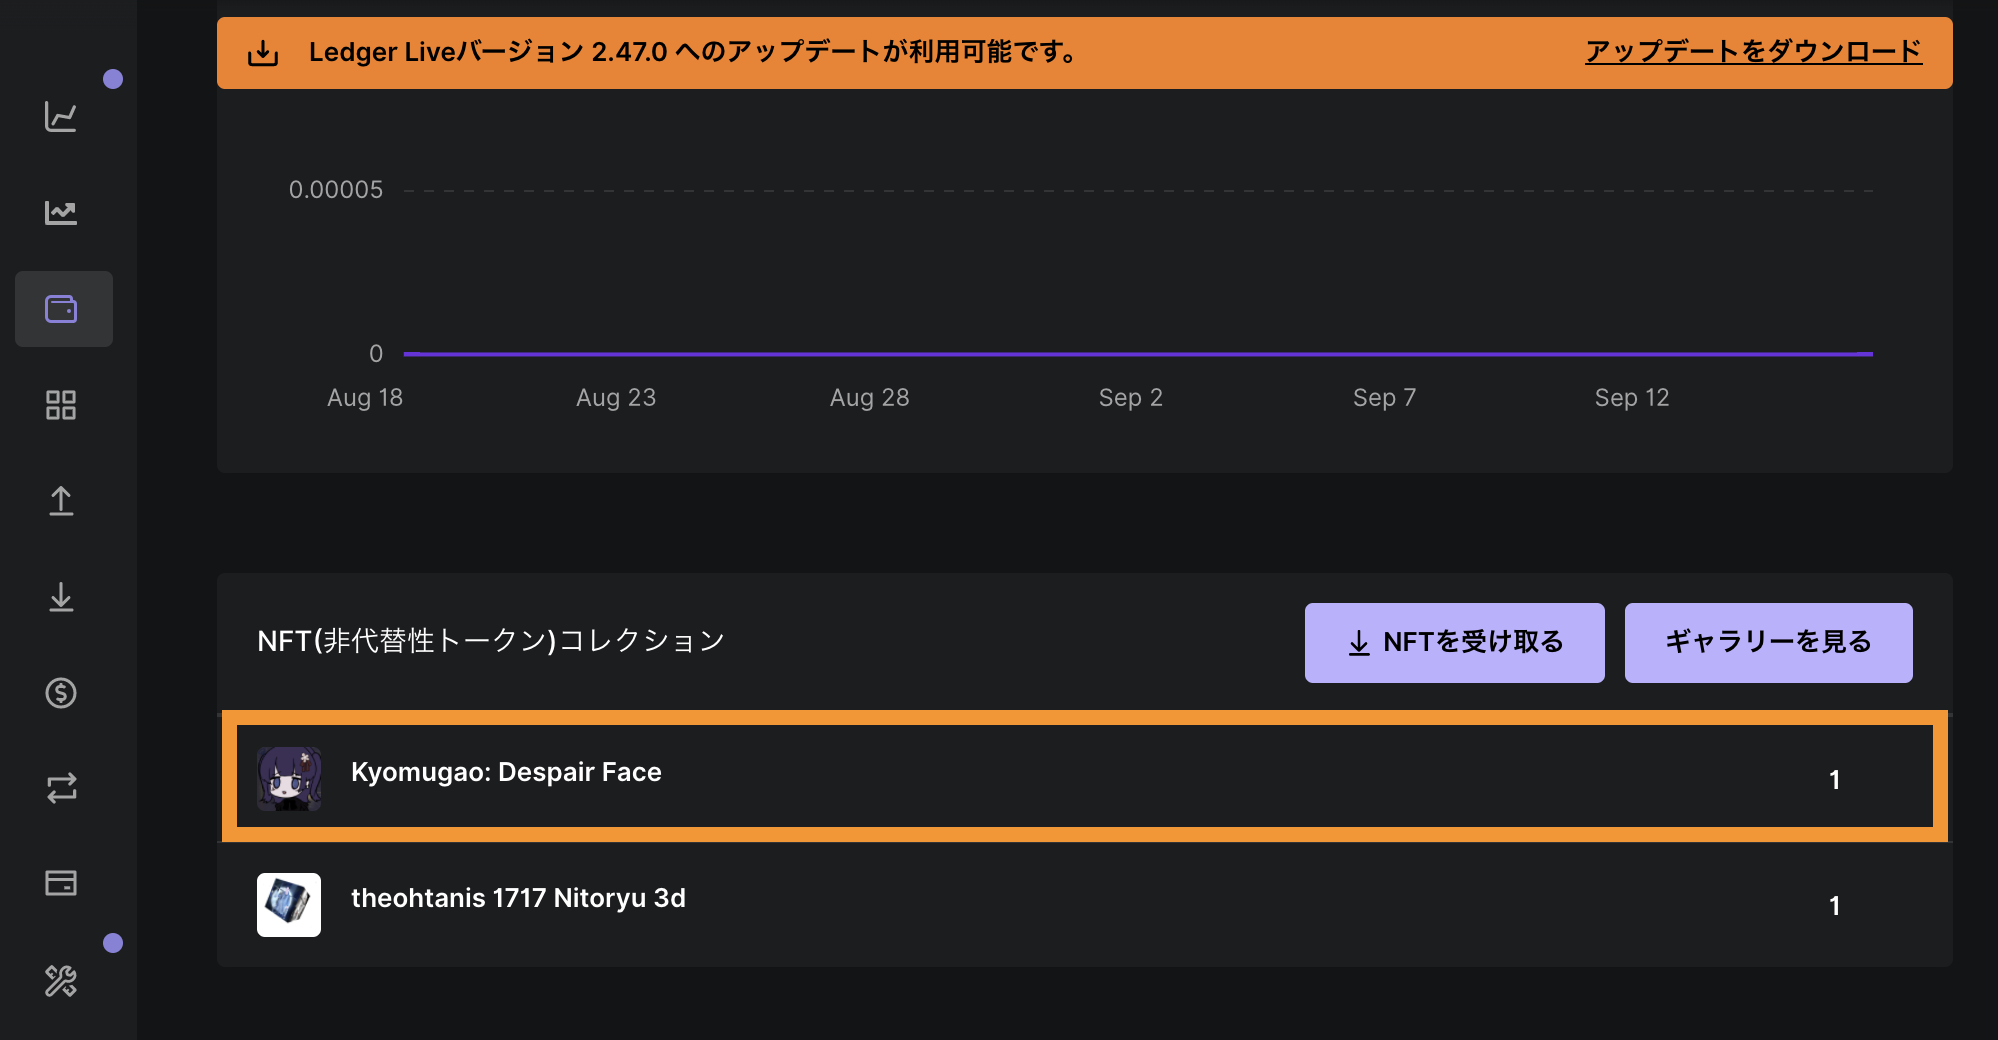
届いてますね。
では、続いてレジャーナノからポリゴンNFTを送信する方法を解説していきます。
ポリゴンNFTの送信方法
レジャーナノで、メタマスクやOpenseaと連携させる方法については下記を参考にどうぞ。
-

-
【レジャーナノ】ハードウェアウォレットの使い方をわかりやすく解説
続きを見る

送りたいNFTコレクションを選択します。

NFT個体を選択します。
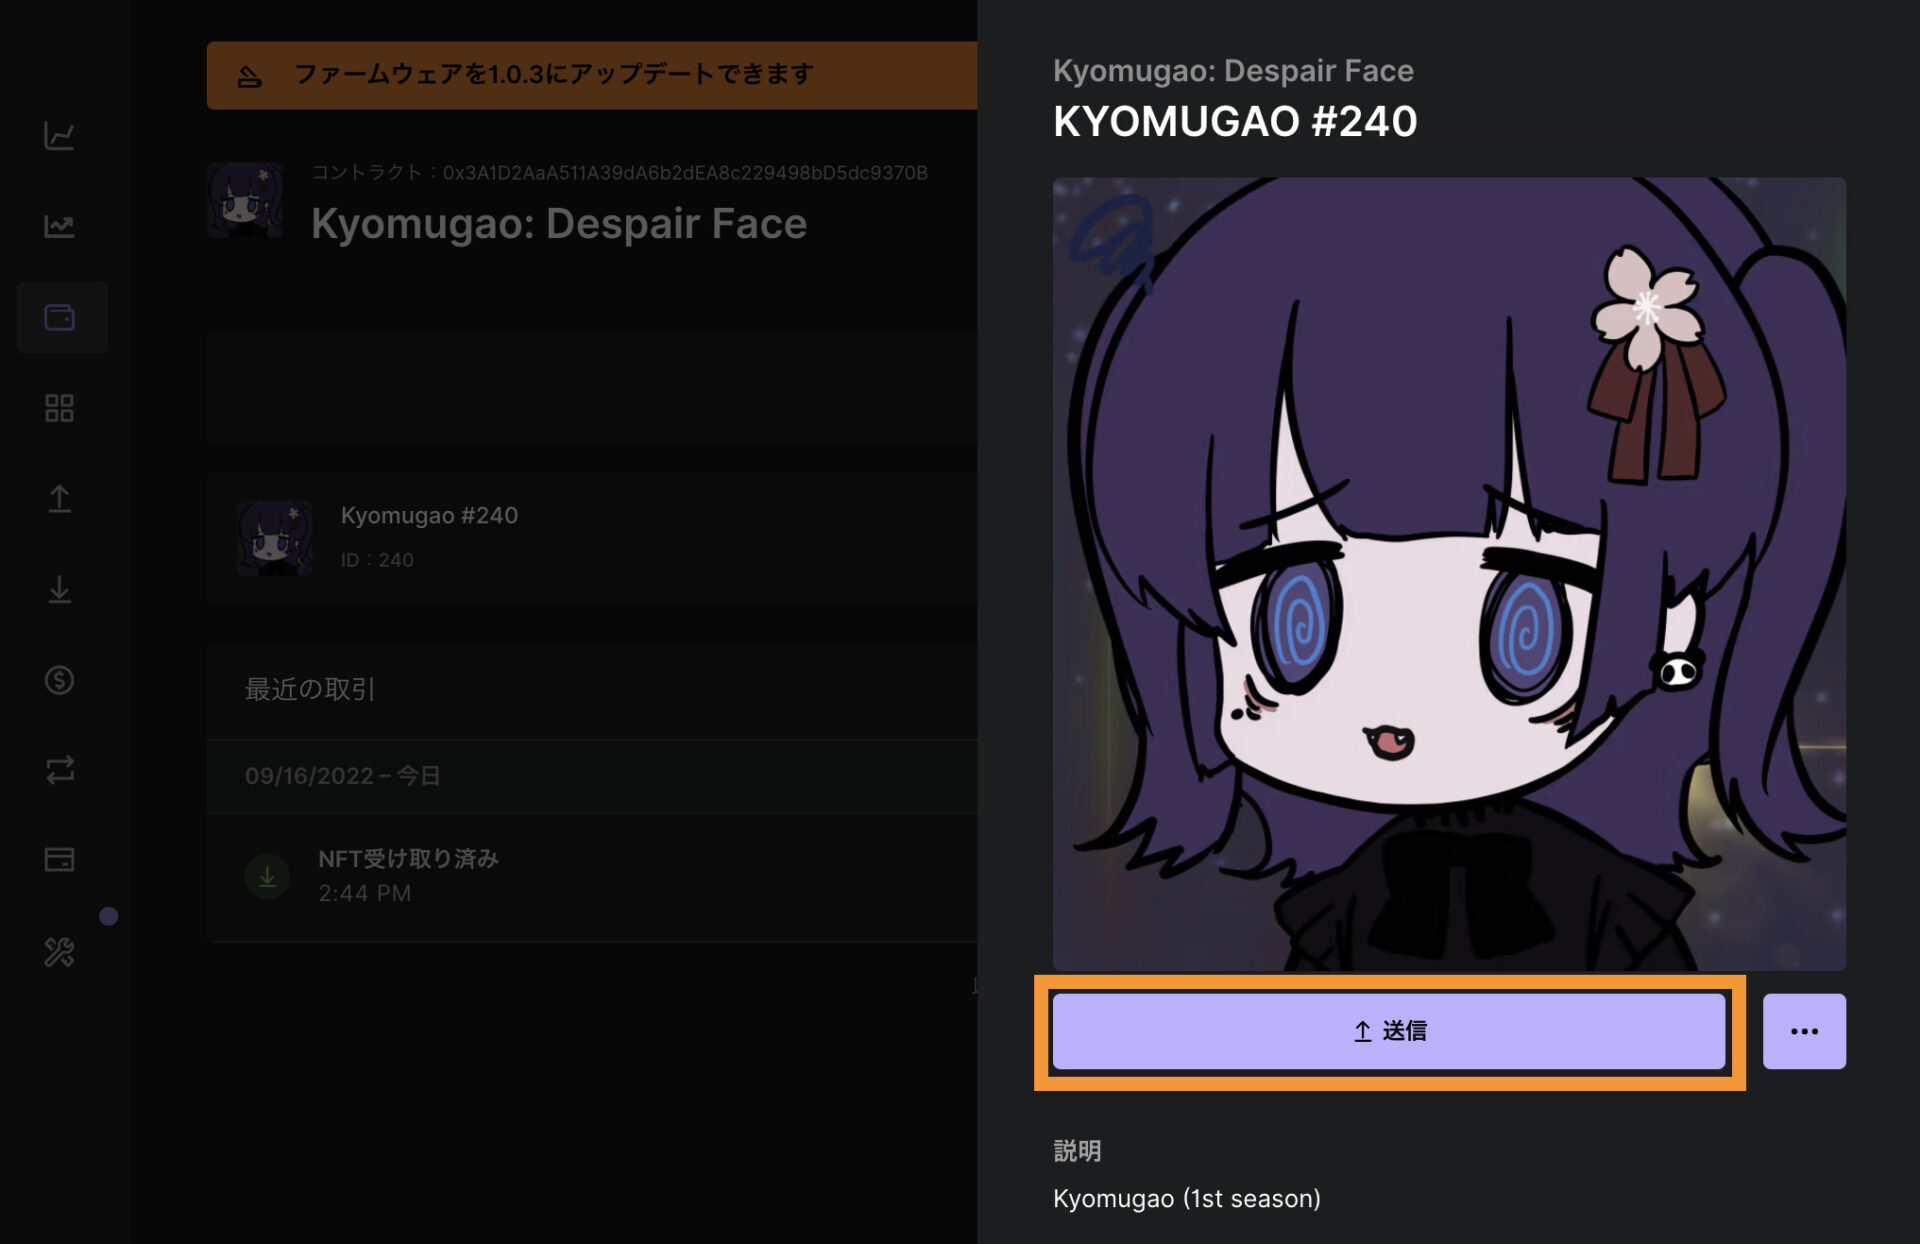
「送信」をクリック。
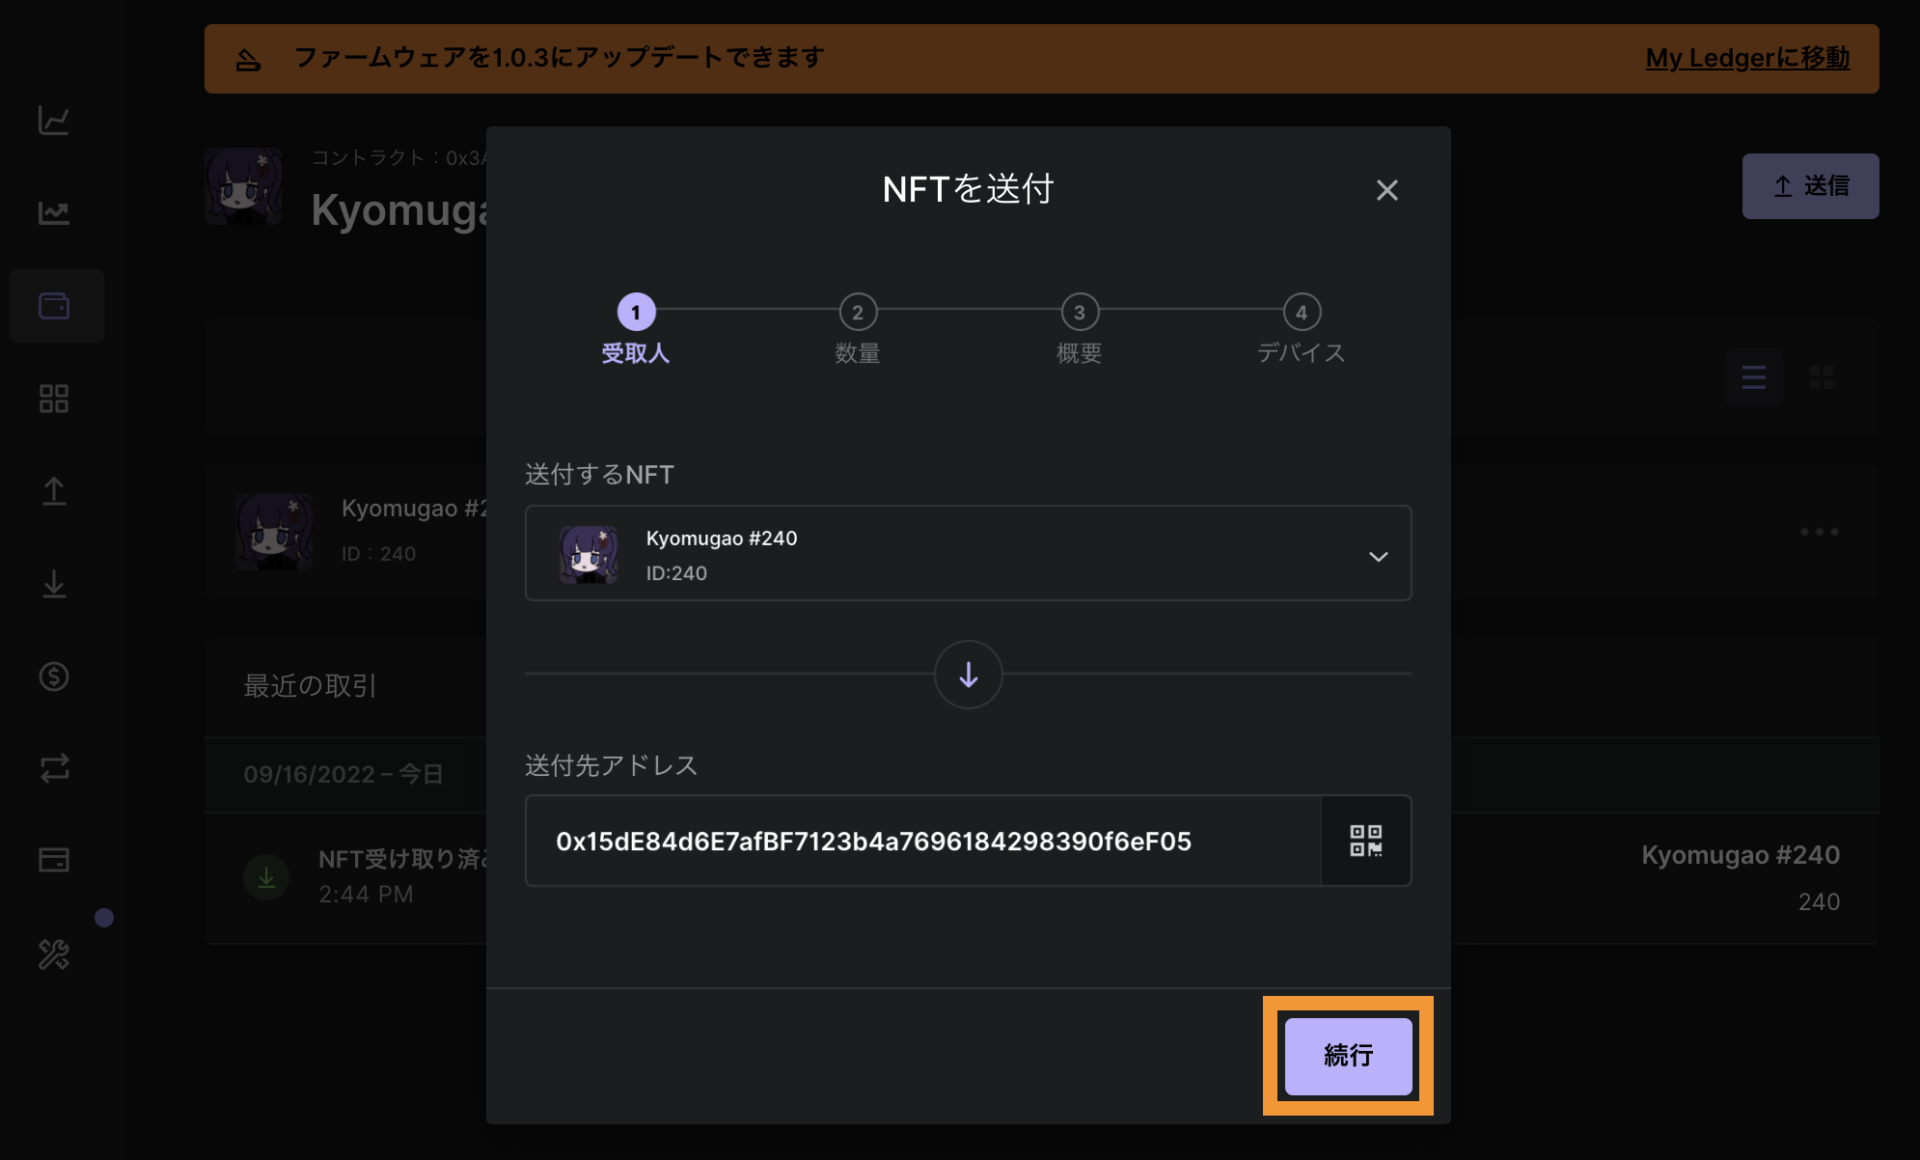
送りたいウォレットアドレスを貼り付けて「続行」をクリック。
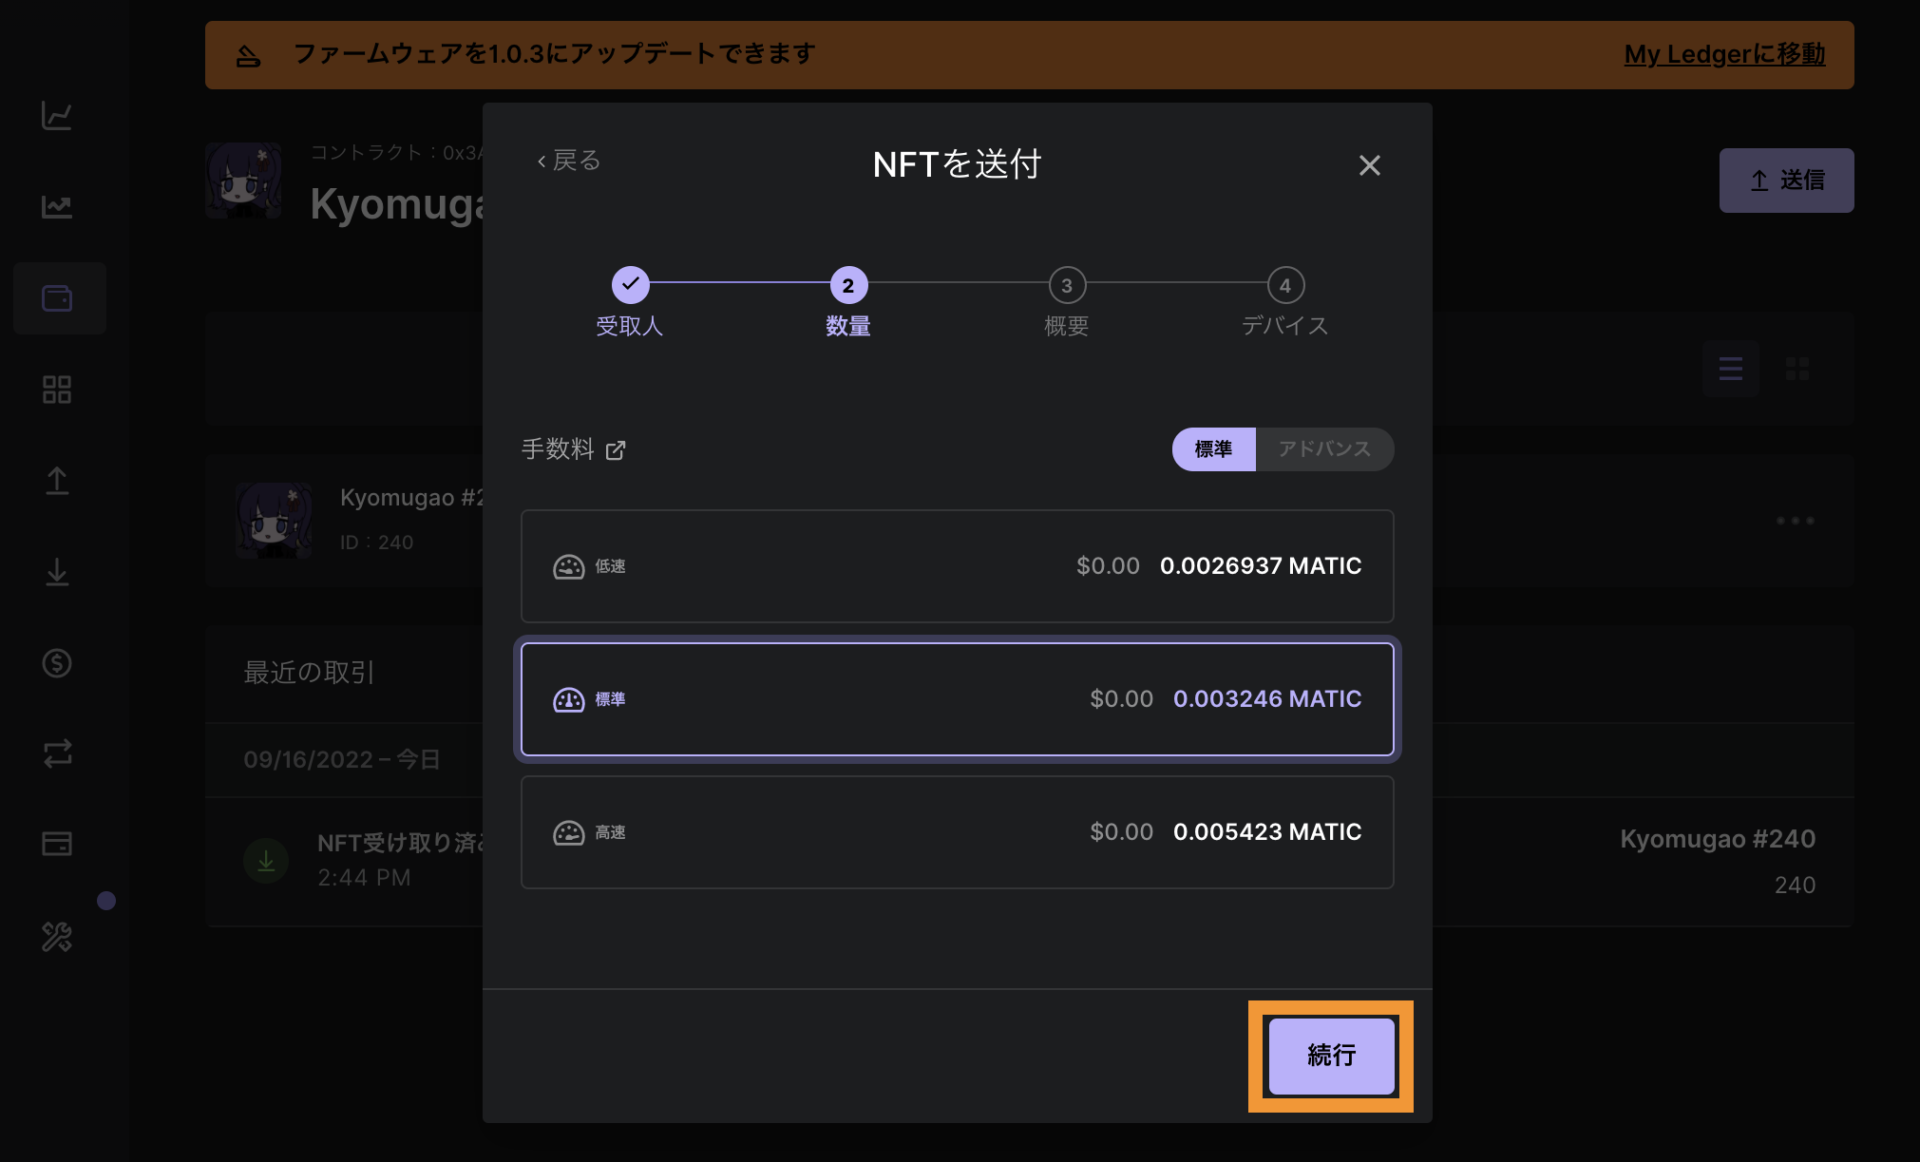
「標準」でOKです。
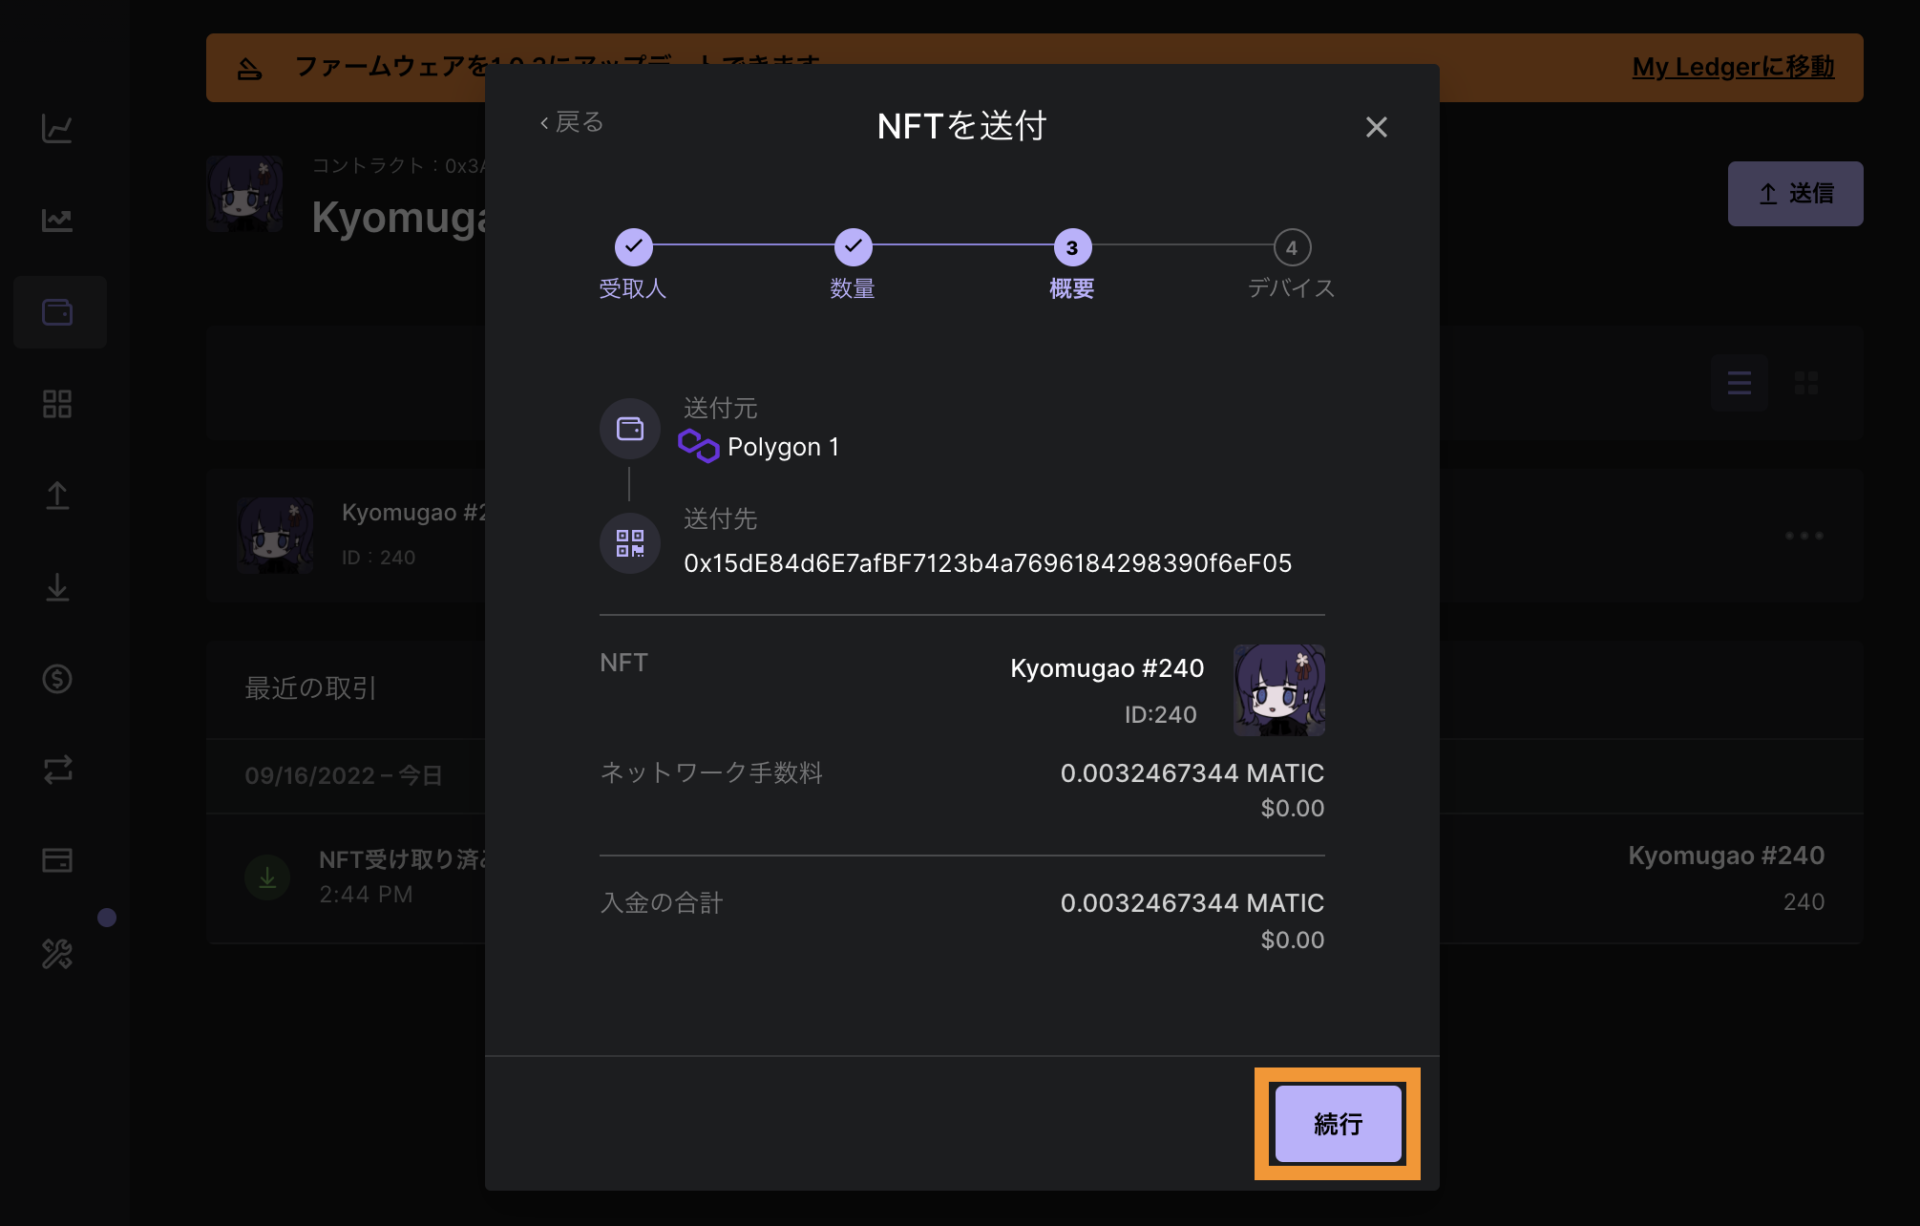
確認して「続行」をクリック。
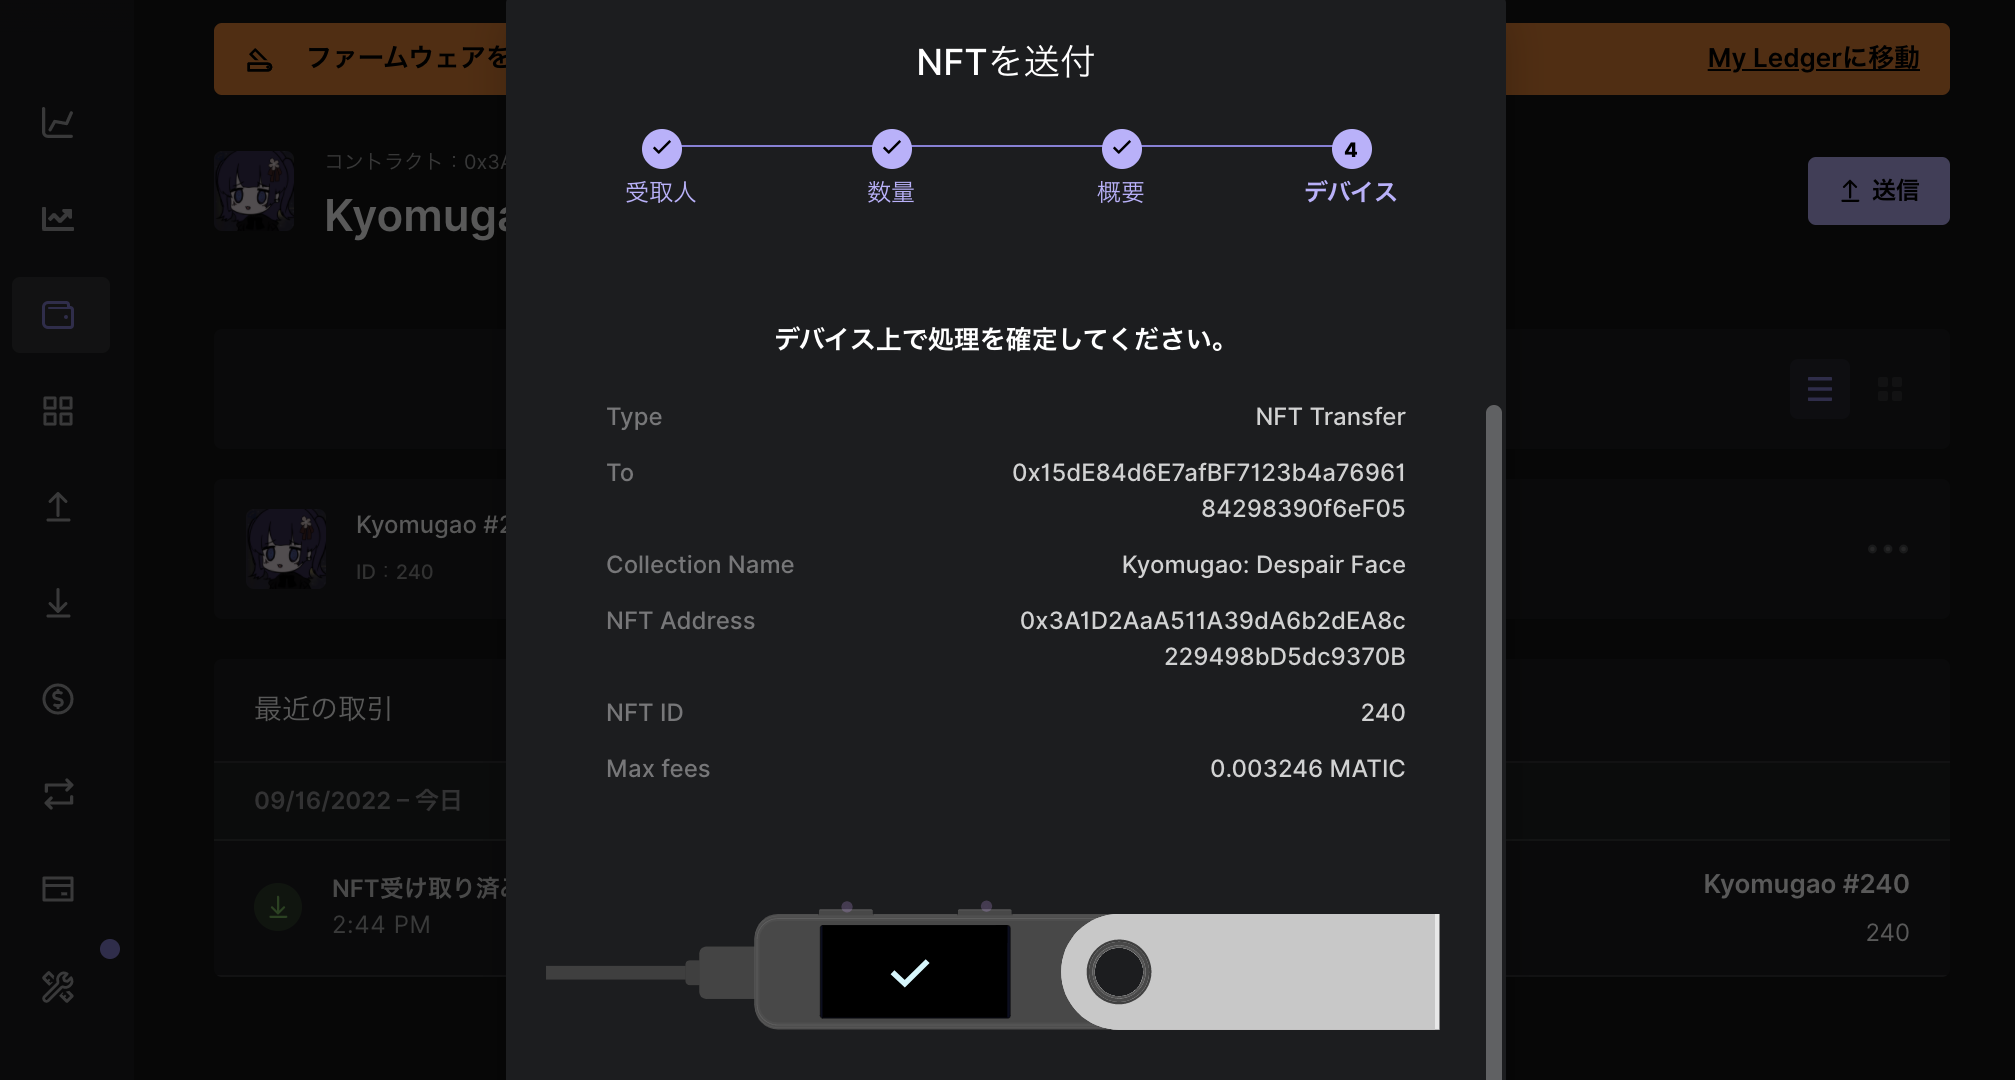
最後にレジャーナノ端末で操作「両ボタンクリック」します。
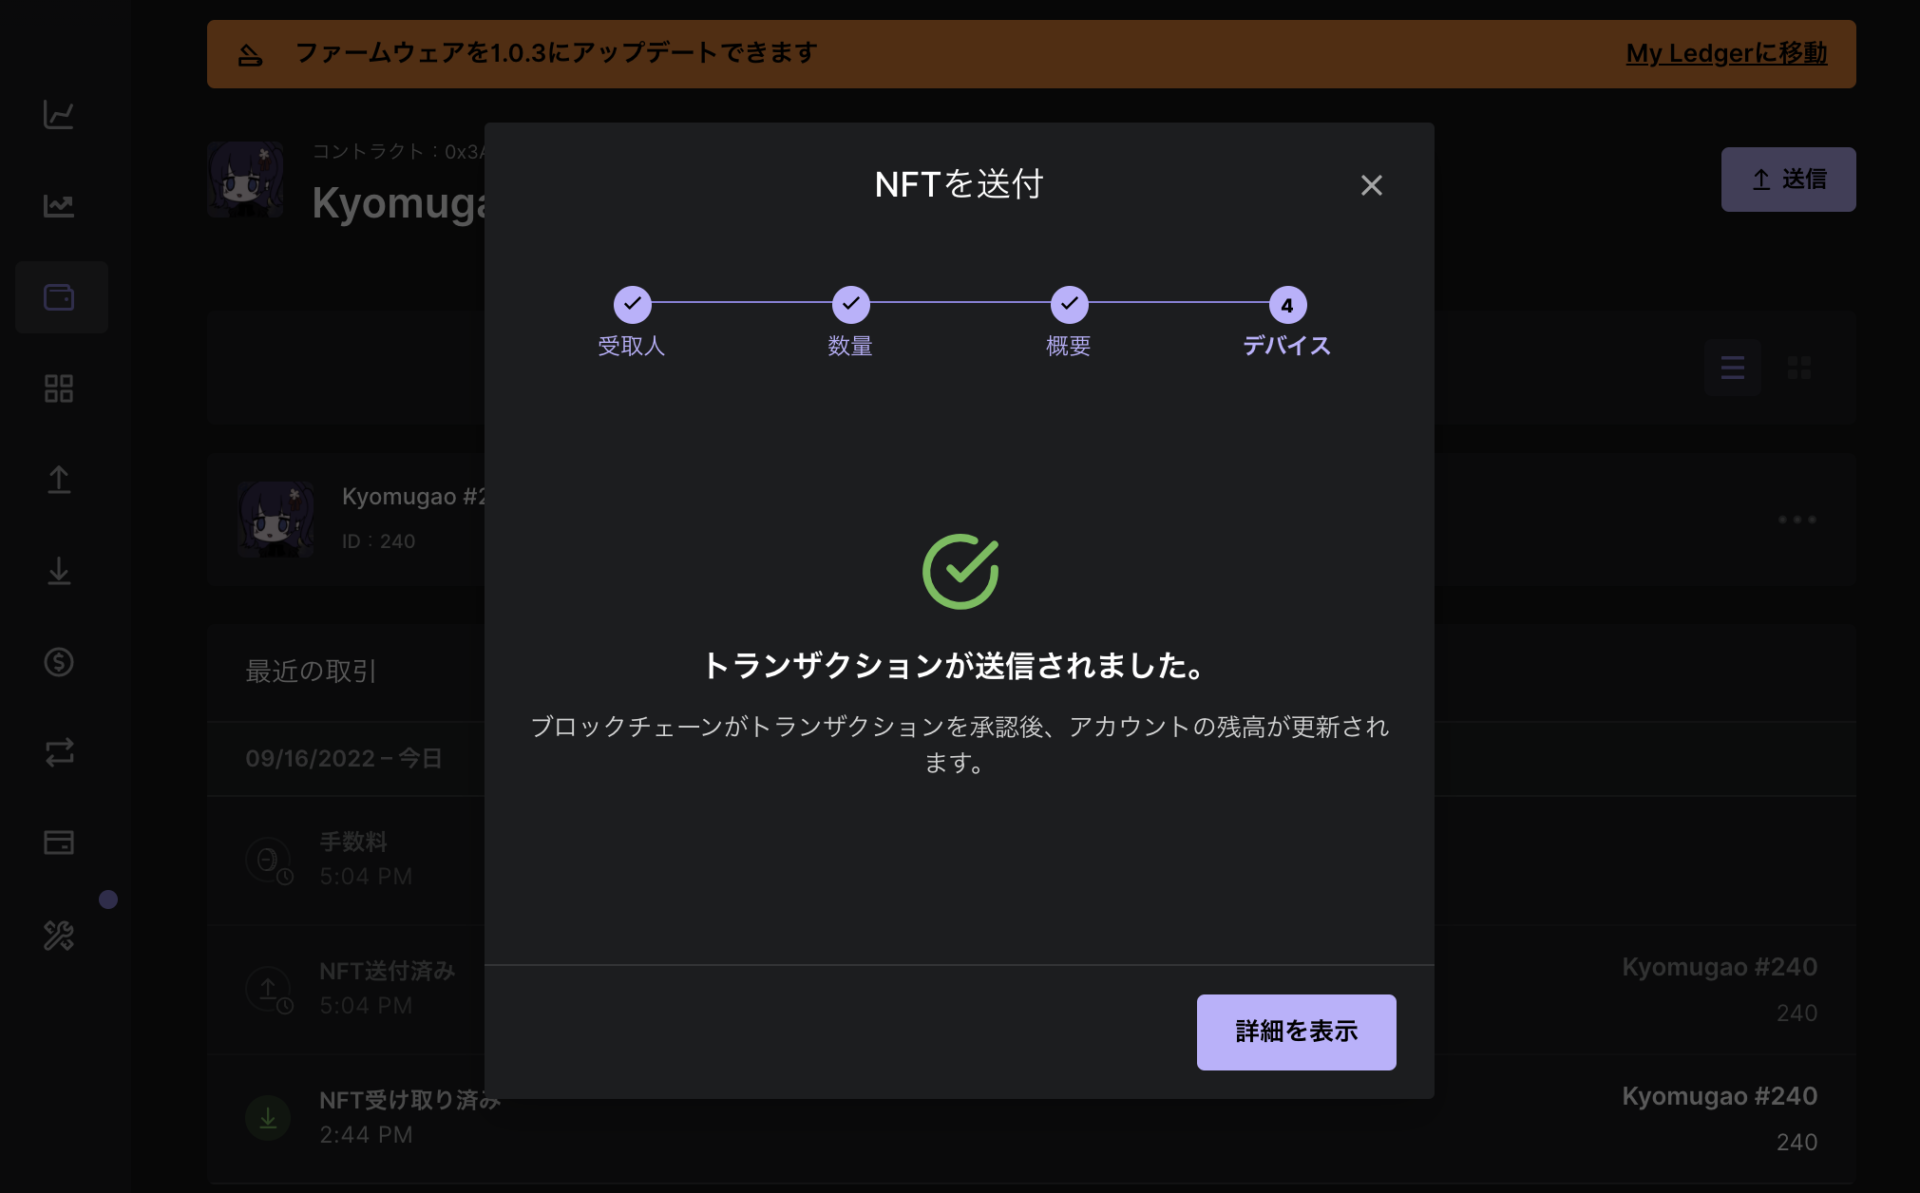
これで送信完了ですね!一応確認しておきます。
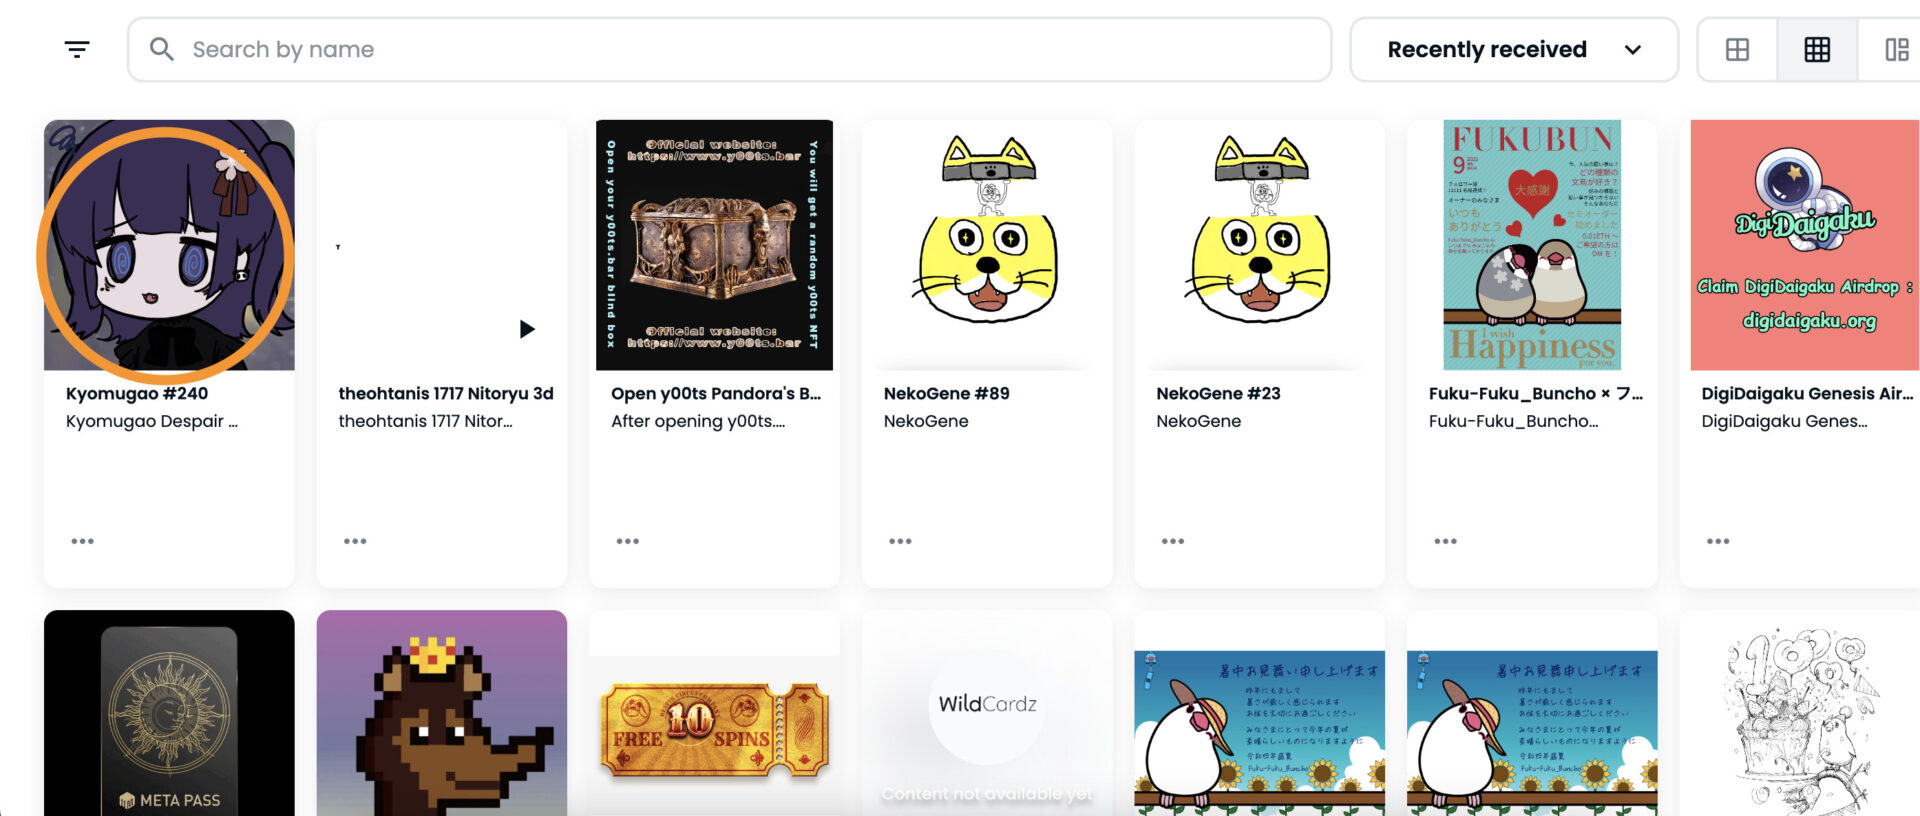
しっかり届いてますね。お疲れさまでした。
今回は、ポリゴン作品をレジャーナノに送受信する方法について解説しました。
最後までありがとうございました!